Fiddlesticks Woodworking

From this to this . . .

A friend of mine took down an old oak tree about a mile from my cabin in Northern Minnesota.  He was kind enough to share several slabs with me.  The slabs have been the gift that keeps giving.  I've made a coffee table for my son, a base for a cushioned bench, and (alas!) a new dining room table . . . something I've wanted to do for years but was waiting for the right inspiration.  It is something approximating pure magic for me to see these rough slabs brought to new life in woodworking projects that will last for years . . . to seem them go from this . . . to this.

One of six oak slabs from my friend:


Coffee table for my son:


New base for a cushioned bench with skirt and tapered legs:


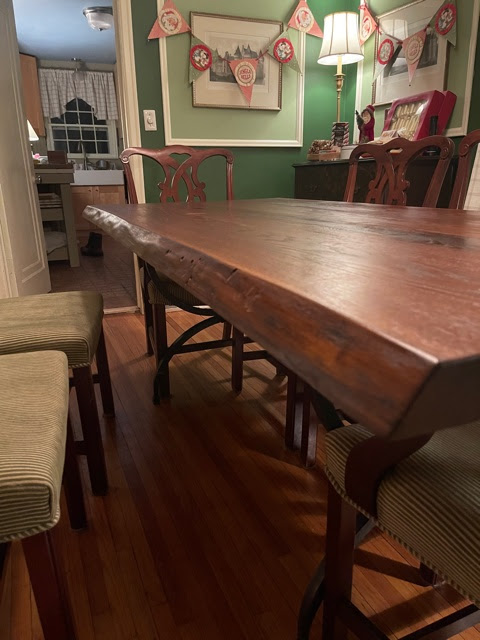
 Alas . . . a new dining room table:


Northern Minnesota, where the oaks grow :)


Phone Holders for Christmas!

 A great way to use up scrap pieces of fine hardwoods for stocking stuffers :)


"Harbour Island" Console Table

This past December, we took a trip to Harbour Island in the Bahamas.  It was beautiful!  Having come back with many wonderful souvenirs, we decided to make a new console table for an empty space in our basement that could display some of them.  The staining and painting of the table is meant to give it a nice beachy, drift-woody, Bahamian look.  Very fun to build!


Christmas 2017!

Backgammon!

I made four backgammon sets this year for family members.  Though there are some variations among the different sets, most were made from walnut and cherry like this one that I made for my brother and his family.  My wife had fun making the dice and checkers.  I finally learned how to play while making the sets!


Candle Holders

I also made eight sets of candle holders as stocking stuffers based on the design here.  The design is particularly fun since it's sort of a woodworking "puzzle" and I've always loved the contrast between walnut and maple.


Soap Trays

More stocking stuffers . . . and a great way to use leftover pieces!  These were cut from what remained of the 4/4 slab of cherry I used in building my new Cherry Writing Desk.


Cherry Writing Desk

I've wanted my own writing desk for quite some time but kept putting it off because, well, I wanted it to be really special and I couldn't quite land on what I wanted to do.  I was originally thinking something in the Shaker style out of Walnut but, alas, I was thoroughly inspired to move in a different direction after watching this series of videos from "Guy's Woodshop". 

The techniques I used are mostly the same as Guy illustrates in his videos if you want to get an idea of how it was made.  I've included some images of the desk at earlier stages of the build, prior to the "aging" process which, notably, makes use of potassium dichromate to speed up time by bringing out the Cherry's own natural beautya method I far prefer over a topical stain which I believe interferes too much with the grain.  I parted ways with Guy on the finish and went with a three-stage process of Walnut oil, Shellac, and paste wax.  There is also a single bowtie on lower right side of the table top to replace a knot.

As I type this post, I'm happy to say it's on the new writing desk which I'm thrilled with.  The desk should last for an eon.  Hopefully it'll be cherished for as long too!


Finally, my "helper" applying some finish to the top :)